Maintenance Tips for Refrigerators & Freezers:
Cleaning
the condenser coils
Keeping
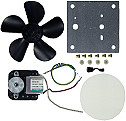
the Drain Pan Clean
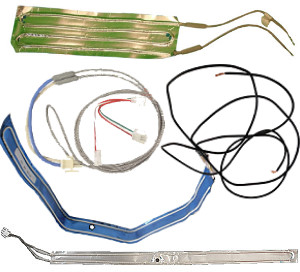
Refrigerator Door Gasket
Refrigerator Temperature Setting
Troubleshooting Refrigerators
Refrigerator isn't running, no sound
can be heard and the light is out
Refrigerator isn't running,
the light is on and you hear occasional clicking
Refrigerator constantly cycles on and
off
Refrigerator doesn't cool well or
runs all the time
Frost forms rapidly or the unit does not
defrost at all
Refrigerator makes an unusual noise
Refrigerator smells unusual
Water is leaking underneath or inside
the unit
Doing conscientious routine
maintenance, a refrigerator will usually perform its tasks
for years with minimal problems. Refrigerators are categorized
according to the way frost is removed from them.
Standard Refrigerators
& Freezers:
- Cycle-Defrost Model
- Defrosts when the Refrigerator compressor cycles off
and the frost on the refrigerator evaporator melts on
it's own, and the melted frost now in the form of water,
drips into the drain trough below the evaporator, down
the drain tube, intro the drain pan underneath the unit,
where it evaporates, from the heat of a condensate heater,
or the heat from the condensing line, that runs through
the drain pan.
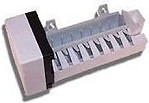
- Frost-Free Model
- Frost on the evaporator, in the freezer compartment
is periodically melted away by a defrost heater that turns
on for 20-30 minutes, every 6, 8, or 12 hours. Clearly,
this type of refrigerator offers the ultimate in convenience,
though it's somewhat more prone to problems and is considered
less energy-efficient.
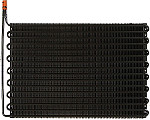
Cleaning
the condenser coils:
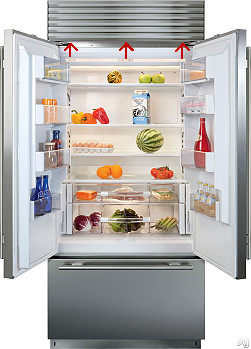 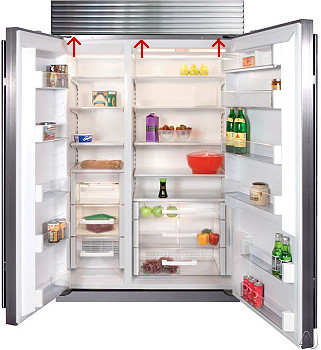
Grill, Screw locations
indicated above by red arrows
- Top Mount Compressor
Models(Most have top mount today) - The condenser
coils need to be cleaned periodically, every few months,
or at least once a year, to make sure that the refrigeration
unit stays cool and efficient. If the condenser coils
get dirty, they will cause the compressor to run too hot,
and the condenser coils get hot as well, because air cannot
flow through them properly, anymore, if it gets dirty,
and covered with dog hair, cat hair, and dust, which does
migrate up to the condenser coils, and sucked into the
coils, due to the condenser fan motor moving air through
the condenser coils constantly. To access the condenser
coils, you must remove the Grill that is located on the
top, front of the unit, by removing the screws that screw
into it, from below. To see the screws, you must open
the refrigerator and/or freezer doors, and they will be
visible, at the top of the cabinet frame, under the grill.
They screw in from below, up into the grill. Remove these
3 screws, and you will be able to pull the grill outward,
from the bottom, and you will feel tension at the top
of the grill, because there are springs attached to the
grill towards the center of the grill, to hold the top
portion of the grill in place. Pull outward from the bottom
of the grill and rotate the grill upward, and you will
be able to see the springs, with hooks on them, holding
them to the grill. Unhook the springs from the grill,
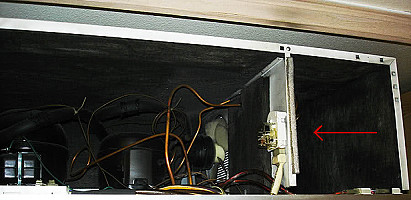
and set the grill aside. On the right side of the upper
compartment, behind where the grill was located, are the
condenser coils. In the center you will see the compressors
behind the metal panel, that is mounted in the front,
center. Get a step stool, to be able to clean the condenser
coils, on the very right side of the upper compartment.
If you look from the very right most you can be, inside
the upper compartment, you will see the fins of the condenser,
and they usually will have dust and dirt covering the
surface of them. If you do not see silver fins, but it
looks all brown, then they are completely covered up with
dirt, and are in serious need of being cleaned, before
you overheat the compressor so much it damages it, or
it locks up.
Refrigerator
Bottle Brush: 
The best way to clean the coils is to use a refrigerator
bottle brush, and a vacuum. Take the long refrigerator
bottle brush and lay it flat lengthwise across the coils,
from front to back, starting at the top of the coils and
gently brush downward, across the surface of the coil
fins. This will remove the dirt off the surface of the
fins of the coils, which is usually the largest amount
of dirt that clogs up the coils, on the surface of the
fins. Vacuum off the bottle brush several times, as you
brush downward across the fins, to get the dirt and dust
off the fins. Then you will take the brush attachment
for the vacuum and do the same thing, brushing downward
on the coils, from the back to the front, to suck out
any residual dirt from between the fins. When you have
gone over the entire surface of the coil fins, you should
now be clean enough for the air to flow through the coils
again, and cool the compressors. When the coils are clean,
reattach the grill by positioning the grill at an angle,
so you can hook the springs back up, on the left and right,
and rotate it so the top sits against the cabinet first,
and then position the bottom of the grill over top of
where the screws comes through, and screw all 3 screws
back into place, firmly, not too tight, or you will strip
the soft metal of the grill the screws screw into.
- Bottom Mount Compressor
Models - The condenser coils need to be cleaned periodically,
every few months, or at least once a year, to make sure
that the refrigeration unit stays cool and efficient.
If the condenser coils get dirty, they will cause the
compressor to run too hot, and the condenser coils get
hot as well, because air cannot flow through them properly,
anymore, if it gets dirty, and covered with dog hair,
cat hair, and dust, which does migrate up to the condenser
coils, and sucked into the coils, due to the condenser
fan motor moving air through the condenser coils constantly.
To access the condenser coils, you must remove the Grill
that is located on the bottom, front of the unit, by removing
the screws that screw into it, in front, on the left and
right sides. Set the grill aside. On the right side of
the bottom compartment, behind where the grill was located,
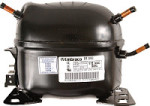
are the condenser coils. On the left you will see the
compressor. If you look from the very right, inside the
bottom compartment, you will see the fins of the condenser,
and they usually will have dust and dirt covering the
surface of them. If you do not see silver fins, but it
looks all brown, then they are completely covered up with
dirt, and are in serious need of being cleaned, before
you overheat the compressor so much it damages it, or
it locks up.
Refrigerator
Bottle Brush:
The best way to clean the coils is to use a refrigerator
bottle brush, and a vacuum. Take the long refrigerator
bottle brush and lay it flat lengthwise across the coils,
from front to back, starting at the top of the coils and
gently brush downward, across the surface of the coil
fins. This will remove the dirt off the surface of the
fins of the coils, which is usually the largest amount
of dirt that clogs up the coils, on the surface of the
fins. Vacuum off the bottle brush several times, as you
brush downward across the fins, to get the dirt and dust
off the fins. Then you will take the brush attachment
for the vacuum and do the same thing, brushing downward
on the coils, from the back to the front, to suck out
any residual dirt from between the fins. When you have
gone over the entire surface of the coil fins, you should
now be clean enough for the air to flow through the coils
again, and cool the compressors. When the coils are clean,
reattach the grill by putting the screws back in, on the
left and right, firmly, not too tight, or you will strip
the soft metal of the grill the screws screw into.
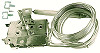
Keeping
the Drain Pan Clean
In automatic defrost models,
water from the melting frost flows out a drain tube, through
the floor of the refrigerator and into a drain pan, under
the unit, where it evaporates. Food particles can be carried
along, clogging the drain and causing odors. Clean the drain
regularly by following these steps:
- Pour about 2 cups of Hot
water into the drain trough, below the refrigerator evaporator,
so it goes down the drain tube, and into the drain pan
below the unit.
- Use a pipe cleaner or similar
device to push any accumulations in the drain tube, down
through the drain tube, and into the drain pan below.
- Empty the drain pan and
wash it, if possible to remove. Most are not removable.
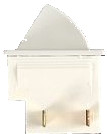
Refrigerator
Door Gasket
The door gasket, if washed
often with soapy water, will usually last as long as the
refrigerator. Check to see if it is sealing well by closing
a dollar bill under the gasket, when you close the door.
If you feel a resistance when you pull it out, the gasket
is sealing. Repeat the test in several places. If your gasket
does not pass this test, it may need to be replaced, or
the door may be warped, and need to be re-warped by loosening
the gasket retainer screws, slightly warping the door at
the top of bottom, to insure the gasket surface is flat
to the cabinet, all the way from top to bottom, when the
door is closed. Most larger units do not require this to
be done, they do not warp.
Refrigerator
Temperature Settings
Temperature settings for refrigerator
and freezer compartments are given arbitrary numbers for
example (1 through 9, warmest to coldest) by manufacturers,
but generally 37-38 degrees F is ideal for the refrigerator
compartment and 0 degrees F for the freezer. If you suspect
a problem, test the temperatures with a refrigerator or
outdoor thermometer.
Troubleshooting
Refrigerators
The
refrigerator has stopped running. No sound can be heard
and the light is out.
Check for:
- No power at the outlet.
- Damaged power cord.
- Circuit breaker tripped
- GFI Tripped(Refrigerators
should never be on a GFI, but some people will install
them, thinking they are doiong something to help the refrigerator,
and when the compressor starts, it pulls more amps, and
can trip GFI outlets!)
Remedies:
- Check the fuse box/circuit
breaker.
- Check the outlet with a
VOM or lamp tester.
- If refrigerator blows fuses,
put it on its own circuit.
- Replace the cord.
The
refrigerator has stopped running, the light is on and you
hear occasional clicking.
Check for:
- Dirty condenser coils.
- Defective condenser fan.
(frost-free types)
- Incorrect or No voltage
reaching the unit.
- Defective thermostat.
- Defective compressor.
Remedies:
- Clean the condenser coils,
with a refrigerator bottle brush.
- Check the condenser fan
for operation.
- Test the thermostat and
replace if necessary.
- Call a Qualified Independent
Service Company.
The
refrigerator constantly cycles on and off.
Check for:
- Wrong voltage reaching
the unit.
- Defective compressor.
- Leaking refrigerant.
- Dirty condenser coils.
Remedies:
- Run the unit its own circuit
and check the voltage at the outlet.
- Call a Qualified Independent
Service Company.
- Clean the condenser coils.
The
refrigerator doesn't cool well or runs all the time.
Check for:
- Thermostat on wrong setting.
- Dirty condenser coils.
- Damaged door gasket.
- Sagging door.
- Heavy frost accumulation.
- Door is open too much.
- Hot and humid weather.
- Inside light on.
- Wet insulation in the door
and sides
- Room too warm.
- Damaged evaporator fan.
- Damaged condenser fan
- Defective defrost timer.
- The refrigerant has leaked
out.
- Evaporator is leaking freon(very
common on SubZero Refrigerators)
Remedies:
- Change the thermostat temperature.
- Clean the condensaer coils.
- Check the gaskets for leaking
air.
- Straighten the door.
- Defrost the unit more often.
- Open the door as little
as possible.
- If the unit runs continuously,
but cools well, there is no problem.
- Check the door light switch
operartion.
- Open the unit on a dry
day and let it dry out. Also, repair or replace cracked
door jambs and panels.
- Check the condenser fan
for damage.
- Check the Defrost timer
for normal operation.
- Call a Qualified Independent
Service Company, to replace
the evaporator and possibly the compressor, depending
on how long rthe evaporator has been leaking freeon and
oil.
Frost
forms rapidly or the unit does not defrost at all.
Check for:
- Door open too much.
- Sagging door.
- Damaged door gasket
- Uncovered food.
- Clogged drains.
- Damaged defrost timer,
heater, or thermostat.
Remedies:
- Open the door as little
as possible.
- Straighten the door.
- Test the gasket and replace
it.
- Cover or seal all foods,
especially liquids.
- Open and clean all drains.
- Check the timer, heater
and thermostat for defects.
The
refrigerator makes an unusual noise.
Check for:
- Unit is not sitting level.
- Rattling drain pan.
- Hard or broken compressor
mounts
- Blocked fan blades.
Remedies:
- Adjust the position of
the unit.
- Move the pan so it doesn't
touch sides of the unit.
- Replace the mounts.
- Check the evaporator and
compressor fans for obstructions.
The
refrigerator smells unusual.
Check for:
- Clogged drains.
- Dirty drain pan.
Remedies:
- Open the drains and flush
them.
- Clean the pan and disinfect
it.
Water
is leaking underneath or inside the unit.
Check for:
- Broken drain hose or drain
pan.
- Clogged drains or full
pan.
Remedies:
- Replace the broken parts.
- Open the drains or empty
the drain pan.
|